

A nakiri earns its space on the cutting board the moment a pile of onions, cabbage, carrots, or herbs needs to become clean, even pieces. Knowing how to use a nakiri means working with its purpose-built geometry instead of treating it like a smaller chef knife. This is a vegetable specialist: flat, fast, controlled, and built to turn repetitive prep into confident knife work.
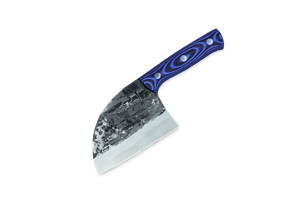
Its rectangular blade can look like a mini cleaver, but a nakiri is not a bone-breaking tool. It is a precision cutter with a thin, ultra-sharp edge designed to travel straight through produce. Use it correctly and you get better-looking slices, less crushed food, and a cleaner, more efficient rhythm at the board.
What Makes a Nakiri Different
A nakiri is a Japanese-style vegetable knife with a wide, mostly straight blade edge and a squared-off tip. Most versions have a blade around 5 to 7 inches long. The blade profile is the key: there is very little curve along the cutting edge, so the knife makes broad contact with the board in one direct downward cut.
That flat edge separates it from a classic chef knife. A chef knife is built for a rocking motion, where the tip often stays near the board as the heel rises and falls. A nakiri does not want to rock. Rocking leaves parts of the edge floating above the food, makes cuts less consistent, and can place sideways stress on a fine edge.
The wide blade also gives you useful working surface. It steadies tall vegetables while slicing, protects your guide hand, and acts as a broad scoop for moving chopped ingredients from board to pan. A well-balanced SAMURA nakiri makes this feel direct and controlled rather than bulky.
How to Use a Nakiri With the Right Cutting Motion
Start with a stable cutting board. Wood or quality plastic is the right surface for preserving a sharp edge. Avoid glass, marble, ceramic plates, or metal trays. They are hard enough to dull or chip even a powerful blade quickly.
Grip the knife with control, not tension. For most cooks, a pinch grip works best: pinch the blade just ahead of the handle with your thumb and index finger, then wrap your remaining fingers around the handle. This puts your hand close to the blade’s balance point and gives you cleaner control over each cut.
Your other hand becomes the guide. Curl the fingertips inward so your knuckles face the blade, then keep your thumb tucked behind your fingers. Let the side of the blade lightly touch those knuckles as it moves. This is the claw grip, and it creates a reliable safety barrier while helping you cut even slices.
Now use a vertical chop. Lift the blade only as high as needed, move it slightly forward or backward to the next cut, then bring the full edge down through the food. The edge should meet the board nearly flat. Think lift, advance, cut. There is no need for aggressive force. A sharp nakiri should separate vegetables with a decisive, controlled drop.
For denser produce such as sweet potatoes, butternut squash, or large carrots, use a short forward-and-down push cut. Set the lower part of the edge into the food, then guide the blade forward and down in one smooth motion. Do not twist the blade if it meets resistance. Pull it out, reposition, and make a second controlled cut.
Let the Knife Do the Work
The common beginner mistake is trying to chop harder. A nakiri rewards accuracy more than brute force. Keep your wrist neutral, your shoulder relaxed, and your strokes compact. When your grip tightens and the knife starts slamming into the board, speed drops and control disappears.
A sharper edge is safer than a dull one because it requires less pressure. If tomatoes tear, onions split unevenly, or herbs bruise instead of slicing cleanly, the edge likely needs attention. Do not compensate by forcing the knife through the food.
Put the Flat Blade to Work
The nakiri is at its best when uniform cuts matter. Its straight edge can slice completely through a vegetable from top to board, without the accordion effect that happens when a curved blade misses the bottom layer.
Use it for onions by halving and peeling the onion, placing the flat side down, then making straight cuts from root end toward stem end. For diced onions, make your vertical and crosswise cuts without needing horizontal cuts. The nakiri’s flat profile reaches through the layers efficiently.
For cabbage, halve or quarter it into stable wedges before slicing. Keep the cut side on the board, then work in measured downward strokes for thin shreds. The wide blade handles the height and density of cabbage better than a narrow paring knife, while the thin edge keeps the leaves from being crushed.
It also shines with carrots, celery, zucchini, cucumbers, peppers, mushrooms, potatoes, leafy greens, and fresh herbs. Stack a few sturdy leaves of kale or chard, roll them loosely, and use deliberate straight cuts for clean ribbons. With herbs, avoid pounding. A gentle, sharp chop preserves their color and aroma.
The blade face becomes a prep tool after the cutting is done. Turn the knife sideways and use the broad side to scoop vegetables. Keep the sharp edge angled away from your palm and away from the pan or bowl rim. Do not scrape the cutting board with the edge itself. Flip the knife and use the spine or flat side to move food, protecting the edge from unnecessary wear.
Where a Nakiri Is Not the Right Tool
A nakiri is a dedicated workhorse, not a one-knife answer for every task. Its squared tip is less useful for intricate work such as hulling strawberries, trimming silver skin, or making small cuts inside a pepper. A paring knife gives better control there.
It is also not made for splitting poultry joints, cutting bones, cracking shellfish, or chopping through frozen food. Those jobs call for heavier, purpose-built tools. A nakiri can handle boneless proteins in a pinch, especially for slicing cooked chicken or cutting strips of bacon, but its real strength remains vegetables.
Large winter squash deserves judgment. If the squash is extremely hard or unstable, do not force a thin nakiri blade through it. Create a flat, stable base first, work slowly, and choose a heavier chef knife or cleaver if the task demands more power. The right knife protects both the food and the edge.
Get Cleaner Results With Better Board Habits
Consistency starts before the first cut. Trim vegetables so they have a stable flat side. A rolling onion, round zucchini, or loose pepper is not just awkward - it is a safety problem. Create a level surface, place it against the board, and keep your cuts measured.
Keep chopped food from crowding your work area. Push finished ingredients to the far side of the board with the blade’s flat, then return to the center. This gives your guide hand room to work and prevents stray pieces from catching the blade.
For batches of vegetables, organize by texture and density. Slice soft mushrooms and herbs after hard carrots or potatoes, not before. Hard ingredients can leave debris or moisture on the board, while delicate ingredients benefit from a clean, dry surface and a freshly wiped blade.
Clean, Store, and Sharpen Your Nakiri
Hand-wash a nakiri promptly with warm water, mild soap, and a soft sponge. Dry it immediately, especially around the handle and blade heel. A dishwasher is rough on sharp edges and can expose the knife to heat, harsh detergent, and collisions with other utensils.
Store the knife so the edge cannot strike metal or other blades. A magnetic holder, blade guard, knife block, or fitted drawer insert works well. Tossing a nakiri loose into a drawer is a fast route to dullness and damaged fingertips.
Honing and sharpening are different jobs. Honing realigns a slightly shifted edge, while sharpening removes a small amount of material to create a new edge. Depending on how often you cook and what board you use, a nakiri may need honing periodically and sharpening when its cuts stop feeling effortless. A whetstone gives the most control, especially for a Japanese-inspired blade with a fine cutting edge.
The goal is not to baby the knife. It is to keep a performance tool ready for real work. Start with a handful of onions or a head of cabbage, slow your motion down, and let the flat edge show you why a nakiri belongs at the front of the knife rack.


Leave a comment