

A beautifully roasted turkey can lose its impact in seconds when it is hacked apart with a dull blade. Learning how to carve roast turkey is less about fancy presentation than working with the bird’s natural structure: separate at the joints, slice across the grain, and keep the skin where it belongs.
The goal is simple. Put generous, intact pieces of white and dark meat on the platter while keeping juices on the cutting board instead of your shirt. A sharp knife does the demanding work. Your job is to guide it accurately.
Set up before you carve roast turkey
Do not carve a turkey straight from the oven. Rest it for at least 30 minutes, and up to 45 minutes for a large bird. This gives the hot juices time to settle back into the meat. Carve too early and the breast will shed moisture as soon as you make the first cut.
Move the turkey to a stable, roomy cutting board with a groove or rim to catch juices. Place it breast-side up, with the legs facing you. Keep a warm serving platter close by, plus tongs or a carving fork for moving finished pieces. A carving fork can steady the bird, but it should not pin and shred the breast while you slice.
Use a sharp slicing knife or a long, narrow chef’s knife. The ideal blade is long enough to make a breast slice in one controlled draw, rather than a sawing motion. A flexible boning knife is particularly useful around joints and for removing meat from the carcass, but it is not the best choice for broad, even breast slices. A sharp chef’s knife remains the true workhorse if it is the best blade you have.
Before starting, test the edge on a folded paper towel or tomato skin. If the knife catches or crushes rather than cuts cleanly, sharpen it first. A dull edge requires force, and force is what tears skin, flattens meat, and makes carving unpredictable.
Start with the legs and thighs
Removing the legs first makes the turkey easier to manage and exposes the breast for cleaner slicing. Pull one drumstick gently away from the body. With the knife, cut through the loose skin in the crease between leg and breast. Continue cutting until you reach the hip joint.
Do not force the blade through bone. Instead, angle the leg outward until the joint pops or becomes visible, then cut through the soft joint. The entire leg quarter should release cleanly. Repeat on the other side.
Separate each drumstick from its thigh by locating the joint between them. It often sits under a small line of fat and skin. Bend the pieces in opposite directions to find the gap, then cut directly through it. If your knife meets hard resistance, stop and reposition. You are likely on bone, not in the joint.
For serving, leave drumsticks whole if guests enjoy a classic, hands-on piece. Slice the thigh meat off the bone for a neater platter and more even portions. Thigh meat has a richer flavor and stays tender, but it is irregularly shaped, so follow the bone closely with a boning knife before slicing the meat across the grain.
Remove and slice the breast meat
The breastbone runs down the center of the turkey. Make one long cut down one side of it, beginning near the neck end and drawing the blade toward the cavity. Keep the knife close to the bone so you do not leave valuable meat behind.
Once you have opened that line, angle the blade outward and follow the curve of the rib cage. Use long, smooth strokes to release one whole breast lobe from the carcass. Your free hand can gently support the breast as it comes away, but keep fingertips above and away from the blade path.
Set the breast skin-side up on the cutting board. This is the move that produces clean slices with intact, browned skin. Slice crosswise into portions about one-quarter to one-half inch thick, depending on how formal the meal feels. Use long forward-and-back strokes with almost no downward pressure. Let the ultra-sharp edge travel through the meat.
Avoid slicing the breast while it is still attached to the bird unless you need a quick, casual serving method. It can work, but the slices tend to be uneven, and the carcass gets in the way of a straight knife stroke. Removing the lobe first gives you far more control.
Repeat on the second breast. Arrange the slices slightly overlapping on a warm platter, then add thigh meat and drumsticks around them. Spoon a little collected turkey juice over the platter, not enough to soften the crisp skin, but enough to keep the meat glossy and moist.
Finish the wings, oysters, and carcass
Pull each wing away from the body and cut through the shoulder joint. Wings are easy to overlook, yet the meat near the joint is tender and flavorful. Serve them whole, or separate the wingette from the drumette at the joint if you are portioning the bird more formally.
Then look for the oysters: two small, dark, exceptionally tender pieces tucked into the hollow on either side of the backbone near the thighs. Run the tip of a boning knife around each one and lift it free. They are small, but cooks who know turkey usually claim them before the platter reaches the table.
Do not discard the carcass. Pull off any remaining meat for sandwiches, turkey salad, soup, or enchiladas. Break the carcass into manageable sections only after the main carving is finished, then refrigerate it promptly if you plan to make stock. The remaining bones, skin, and roasted bits carry real flavor.
The knife technique that keeps slices clean
A turkey does not need aggressive chopping. Most of the bird separates at joints, and the breast yields best to a long slicing stroke. Keep the blade nearly parallel to the cutting board when removing meat from bone, then perpendicular to the grain when portioning it.
Grip the knife firmly but without tension. Pinch the blade just in front of the handle with your thumb and index finger, while the remaining fingers wrap the handle. This gives better control than holding the handle at its far end. Keep your non-knife hand in a claw shape when stabilizing meat, with fingertips curled away from the edge.
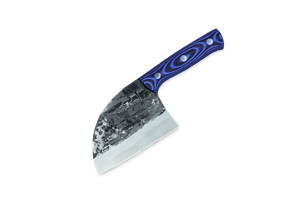
If the skin begins to pull instead of cut, wipe the blade clean and reassess the edge. Sticky residue can drag a slice, but a dull knife is usually the real problem. A well-maintained blade, such as a dedicated carving knife or a capable SAMURA chef’s knife, delivers smoother cuts with less pressure.
Common turkey carving mistakes
The most common mistake is rushing the rest. Even flawless knife work cannot compensate for breast meat that has not had time to retain its juices. The second is cutting through joints or bones instead of locating the natural separation point. Forcing the knife risks a chipped edge and a messy result.
Another mistake is using a serrated bread knife because it seems long enough. A serrated blade can tear delicate turkey skin and leave ragged surfaces. Save it for crusty loaves. A smooth, sharp edge is the better tool for roasted poultry.
Finally, do not chase perfect symmetry at the expense of warm food. Turkeys vary in shape, and one breast may release more easily than the other. Focus on clean pieces, safe knife handling, and a platter that lets every guest choose white or dark meat.
Carving gets easier with repetition, but the first turkey does not need to be intimidating. Rest the bird, trust the joints, and use a sharp blade with deliberate strokes. The result is a turkey that looks as good on the platter as it did coming out of the oven.


Leave a comment